
Glue Down Installation Instruction
Bamboo flooring can be installed by 3 different methods, including nail-down with sub-floor, glue-down on underlay and floating. Any of them is suitable for bamboo and solid hardwood flooring, the difference is:
- Nail down installation: Takes longer time and a lot of work, but flooring is very stable on the sub floor, no movement. The walking feeling is the best.
- Glue down installation: Fast installation method, but a lot of adhesive is involved, it might pollute your house air for next few months.
- Floating installation: Fast installation and DIY installation method, easy to replace, walking feeling is not excellent.
Glue down installation is that flooring will be glued on the ground directly, this installation will help the stability of whole flooring, no movement, because it is like one big piece of flooring, not many single pieces of flooring joined together. Glue down installation is very suitable for heating flooring.
- Step 1: Marking your Starting Line
We recommend you install your flooring parallel to the longest outside (exterior) wall in the room.
Do not work on top of the newly installed flooring. In some circumstances it may be necessary to work on top of the newly installed flooring, those instances make sure to use a kneeler board to support your weight evenly.
- Step 2: Spread the Adhesive
The adhesive should not be applied if subfloor or room temperature is below 60°F, (16°C).
Spread sufficient amounts of adhesive with a the recommended trowel. It will take 1 hour for drying of adhesive, so please wait for 1 hour to go next step.
Hold trowel at a 45° angle. The trowel will leave ridges of adhesive and will leave very little adhesive between the ridges. If adhesive dries quickly, remove and spread new adhesive to achieve proper bonding to the subfloor.
During the installation, occasionally remove a flooring unit (piece) for the subfloor and inspect the back for proper adhesive transfer. Transfer of at least 50% is necessary to ensure sufficient holding strength.
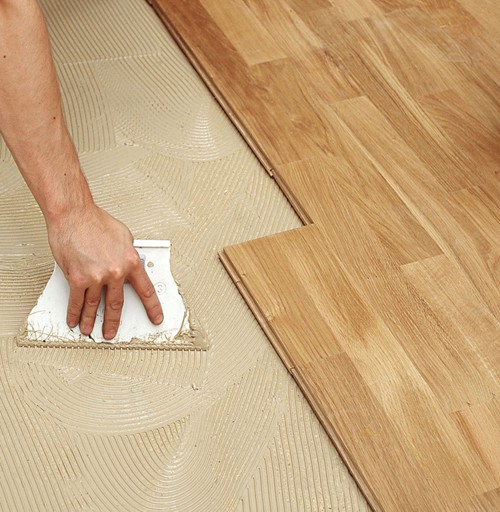
Spread the glue
- Step 3: Installation of Flooring
Do not slide the planks through the adhesive when placing them in position. Simply place the long tongue into the adjoining long groove as close as possible to the short adjoining end and adjust into final position. Planks should be butted tightly to adjoining plank.
A random mixing of the various surface graining configuration is suggested to enhance the natural beauty of this floor. Floor should be installed from several cartons at the same time to ensure a good color and shade mix.
The first row of planks should be installed with the edge of the groove lined up on the chalk line. The tongue should be facing the starting wall. The first row must be aligned and seated in the adhesive as all additional rows will be pulled back to this original row.
On additional rows it may be necessary to align planks with a cut-off piece of scrap as shown. A soft rubber mallet can be used to tap the planks on the edge until they are pulled into proper position.
Install the floor
- Glue Down Installation Points:
- Check for a tight fit between all edges and ends of each plank. End joints of adjacent rows should be staggered a minimum of 6 inches.
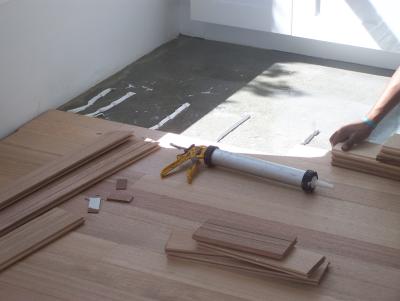
- Complete the installation using the same procedures. Be sure not to spread the adhesive too far ahead of your work area.
- As you are installing the floor, clean the adhesive residue off the floor with soap and water and a clean cloth. If the adhesive should set up on the flooring, then use mineral spirits on a damp cloth.
- Avoid heavy foot traffic on the flooring for at least 24 hours. Move the furniture back into the room after 24 hours. Do not cover the floor for 7 days after installation, to ensure proper cure of the adhesive.
- There should leave 8-12mm gap between flooring with the wall as the expanding or shrinking of flooring after installation.
- Glue Down Over Concrete Slab:
- Concrete must be fully cured and at least 60 days old.
- Moisture Content - All concrete should be tested for moisture as outlined previously in the guideline.
- Preparation-Concrete must be clean, dry, structurally sound, properly cured and free of dirt, oil, paint, old adhesive, wax, sealers and curing agents. The concrete must be flat to a tolerance of 3/16" in a 10" radius. Level low spots with appropriate leveling material.
- Glue Down Over Wood Subfloor:
- a) Wood subfloor must be structurally sound and well secured
- b) Wood subfloor must be clean and dry
- c) Wood subfloor must be sanded flat to a tolerance of 3/16" in a 10" radius
- d) Remove all contaminates that may interfere with bonding
- e) Nail or screw subfloor every 12" on center along joists to avoid squeaking.
If you want a perfect heating system in your house, please kindly follow this instruction, it is very helpful for your flooring and extend the flooring life.
 皖公网安备 34180202000049号